
The Battle of Magenta, 1859
13th March 2025, 2 Comments
Bismarck’s Wars, Fire & Fury, 10mm
Okay, Bismarck wasn’t responsible for this one, but it still fits into the same historical period. As I’d recently painted up some Italian buildings, we decided to take the fight to Northern Italy this week, and fight part of the Battle of Magenta – the big scrap outside Milan between the French and the Austrians. We zeroed in on the Austrian I Corps defending the Naviglio canal, west of Magenta, and the decisive flanking attack by French Imperial Guard. 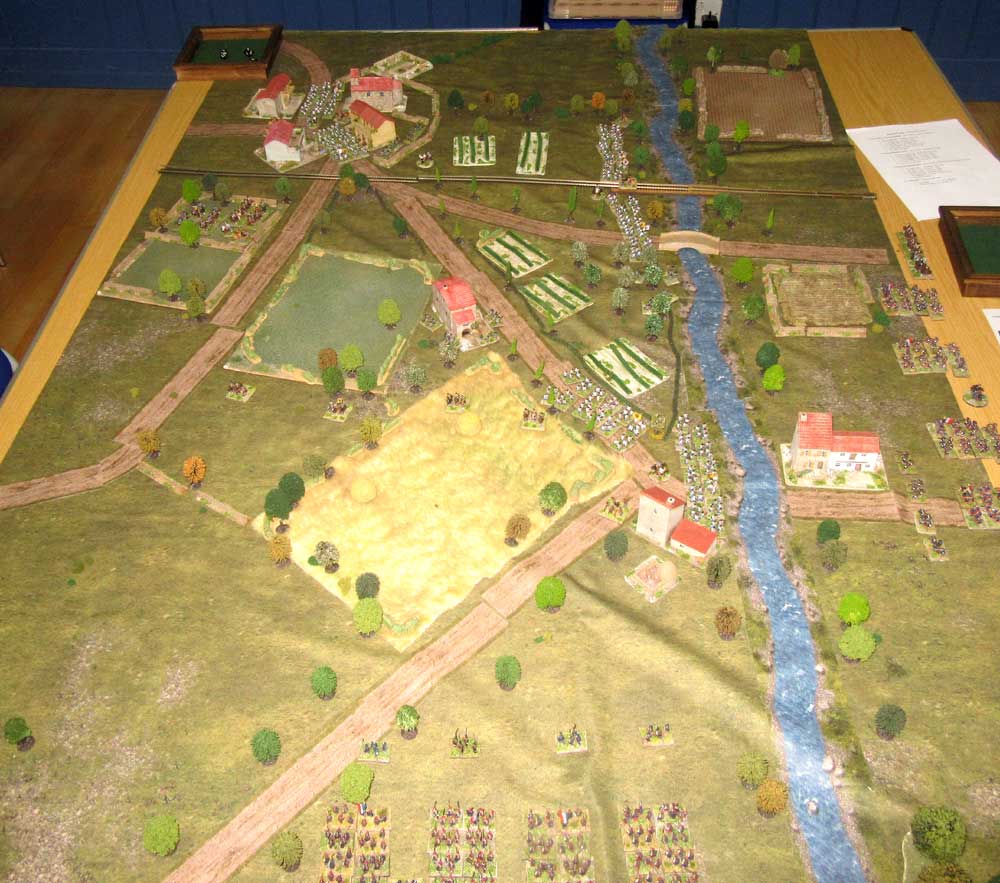 By limiting ourselves to part of the battle – the initial French assault – we were able to capture the main features of Magenta, but still game it out on a club night with Corps-sized forces, on a 6×4 foot table. In this one I commanded the Austrians I Corps, while Sean led the French Guard. Half of Sean’s force (Gen. Mellinet’s 1st Guard Div.) began west of the Naviglio canal, while the rest (Gen. Camou’s 2nd Guard Div.) appeared on the northern table edge.
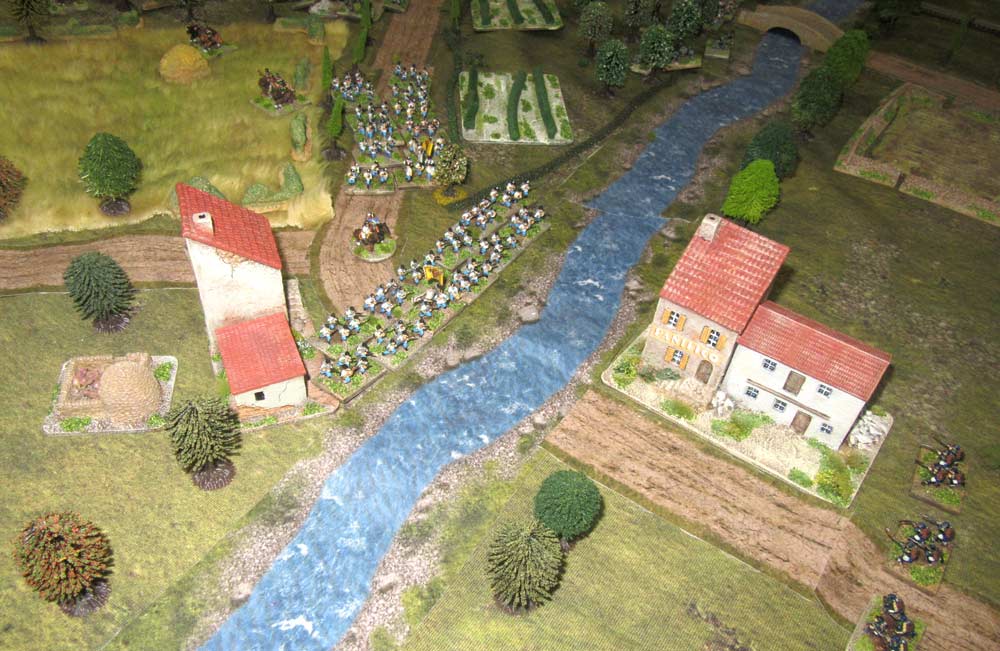 My troops were pretty scattered, with Gen. Baltin’s brigade (two 12 stand regiments, a 4 stand jaeger bttn. and a gun battery) deployed near the canal-side village of Boffalora (above), guarding the blown bridge there, while Gen. Burdina’s brigade (of the same size) was a little to the south, guarding the bridge at Ponte Nuovo. I had a third brigade (Szabo’s) in reserve at Magenta, two miles to the rear, along with some cavalry.
 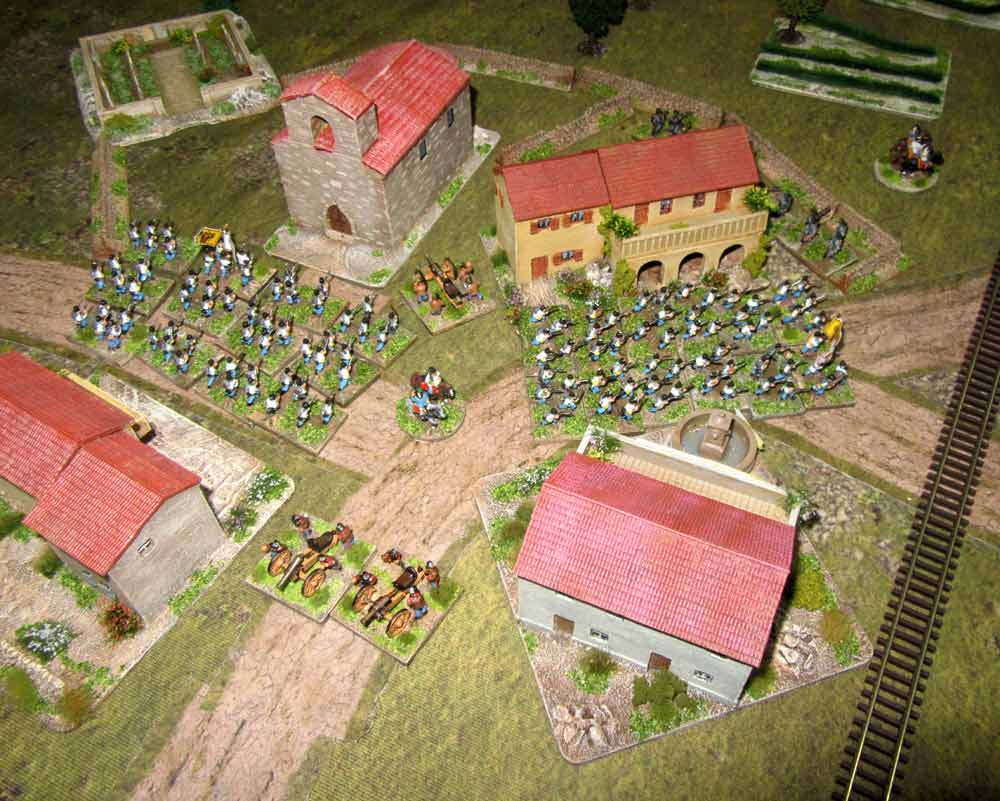 Yes, we’d scaled everything down – and as there was just two of us, we dropped a third French division appearing in the north, and a fourth Austrian brigade in reserve. There were a lot more troops in the vicinity in the real battle, but none of them took part in the opening stages, so we left them out. My plan was to hold both river crossings, but also to protect my right flank by sending my reserve in Magenta (below)to form a defensive line to the north.
 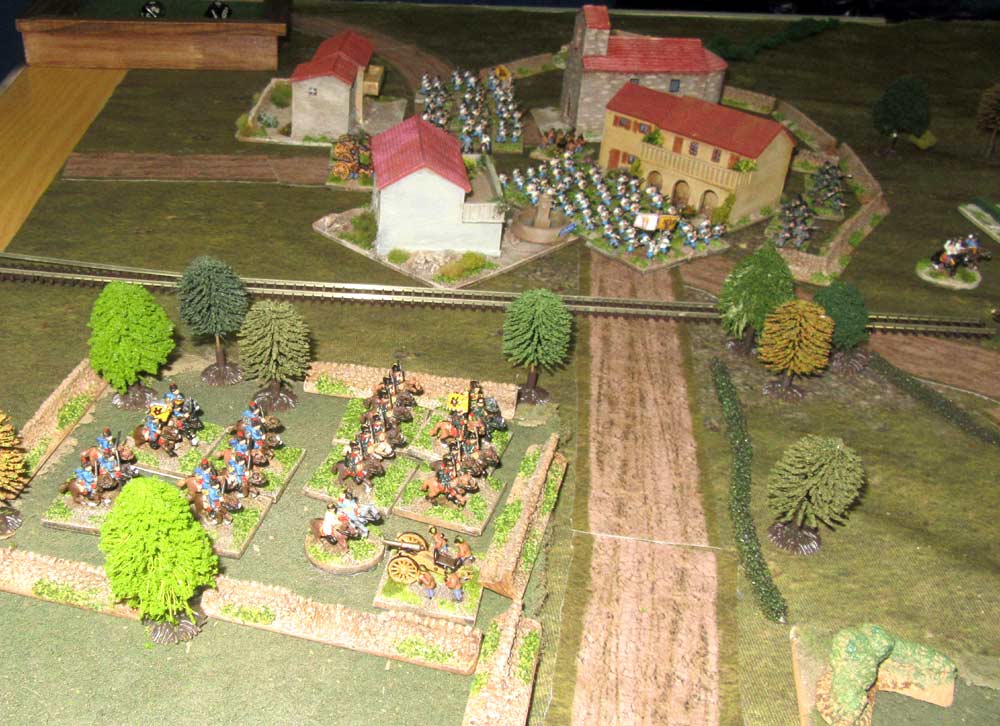 Sean played a long game – a whirlwind assault by Camou’s Guards division towards Boffalora, while Mellinet’s guardsmen held back from launching a frontal attack at Puento Novo, until the Guard artillery had weakened the defenders. Sure enough, the guns pounded away from across the canal, concentrating on the defenders of Buffalora, while French engineers stood ready to repair the bridge there when the village was taken by Camou.
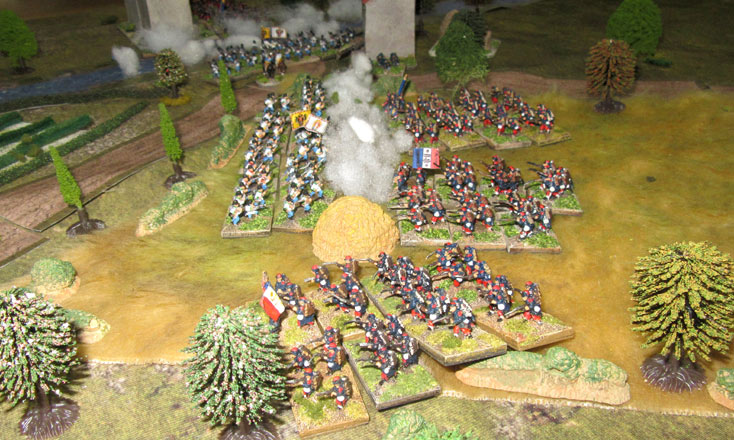
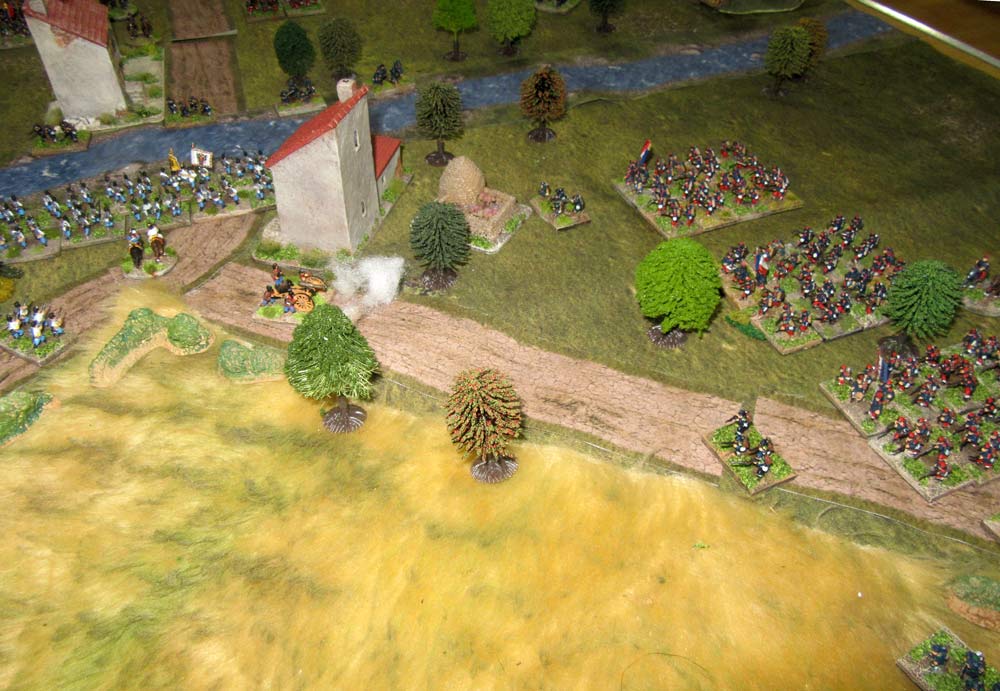 When it came the whirlwind assault lived up to its name. From across the canal, French artillery and chasseurs whittled down the Prince Wasa regt. defending Boffalora, while guns and chasseurs to the north silenced the Austrian guns covering the northern road into the village. Eventually, the Austrian 60th regiment was forced to retreat, while the rest of the French Guards Division occupied the village, then moved on towards Magenta.
 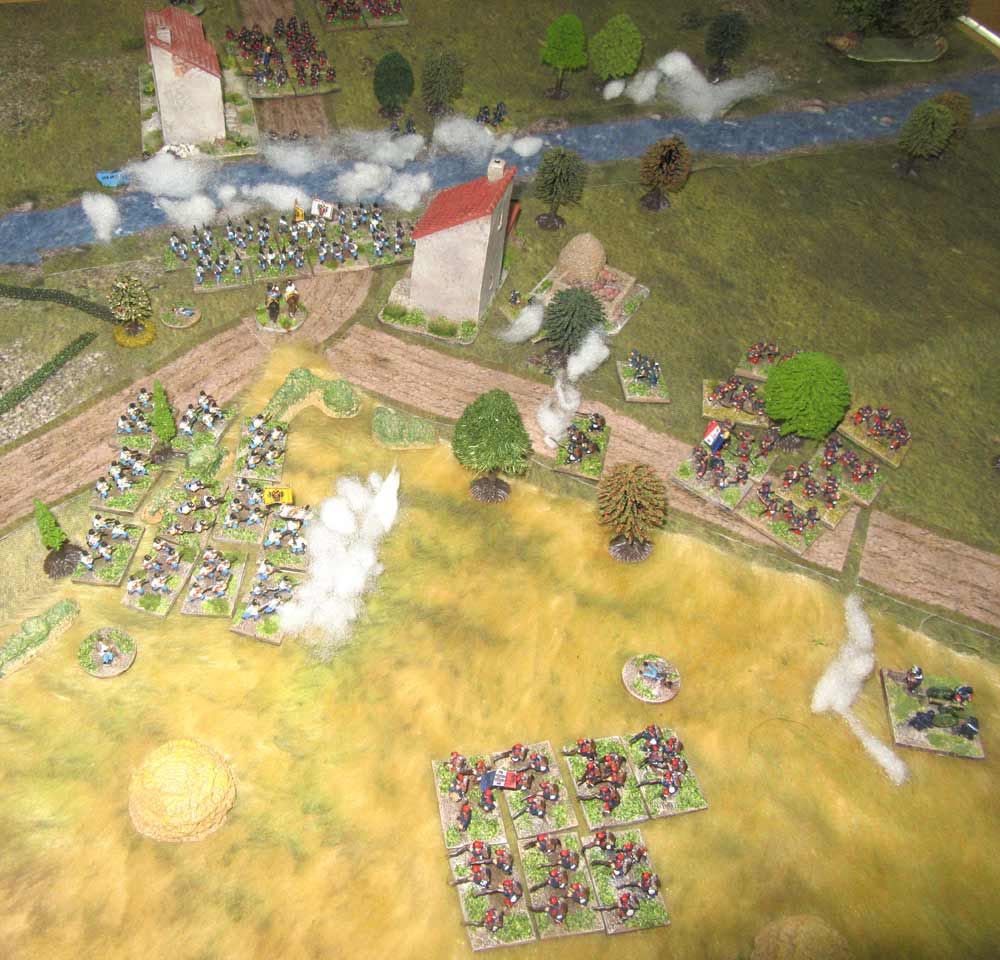 All though, wasn’t quite lost. A second Austrian regiment, the 29th, was still in column when the French |guard Voltigeurs charged it, but it held its ground, forcing the voltigeurs to retreat and lick their wounds. That bought some time for the defenders. So too did the stalwart defence of a farmouse, the Cascina Nuova, which kept the rest of the French at bay for two crucial turns. For a while then, the whirlwind stopped spinning.
 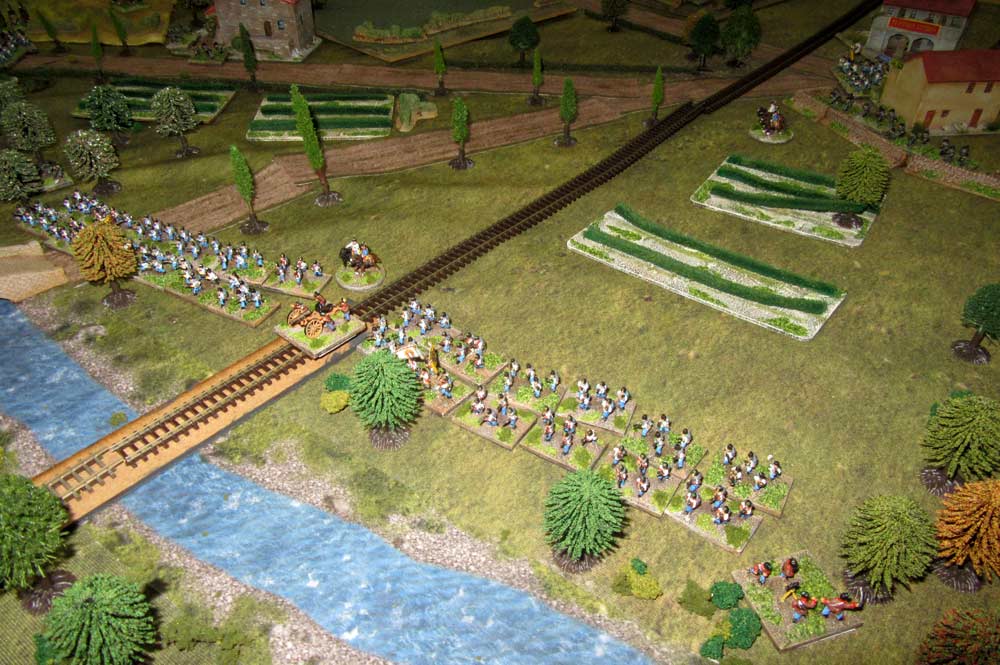 Over by the Naviglio Canal, the engineers were making slow progress getting a viable crossing laid across the blown bridge at Boffalora. Further south at Ponte Nuovo Sean decided not to charge across the road and rail bridges there, into the teeth of a still viable Austrian defence. His artillery there had proved less effective than their counterparts opposite Boffalora. Instead, half the French force waited for the engineers to finish building their crossing.
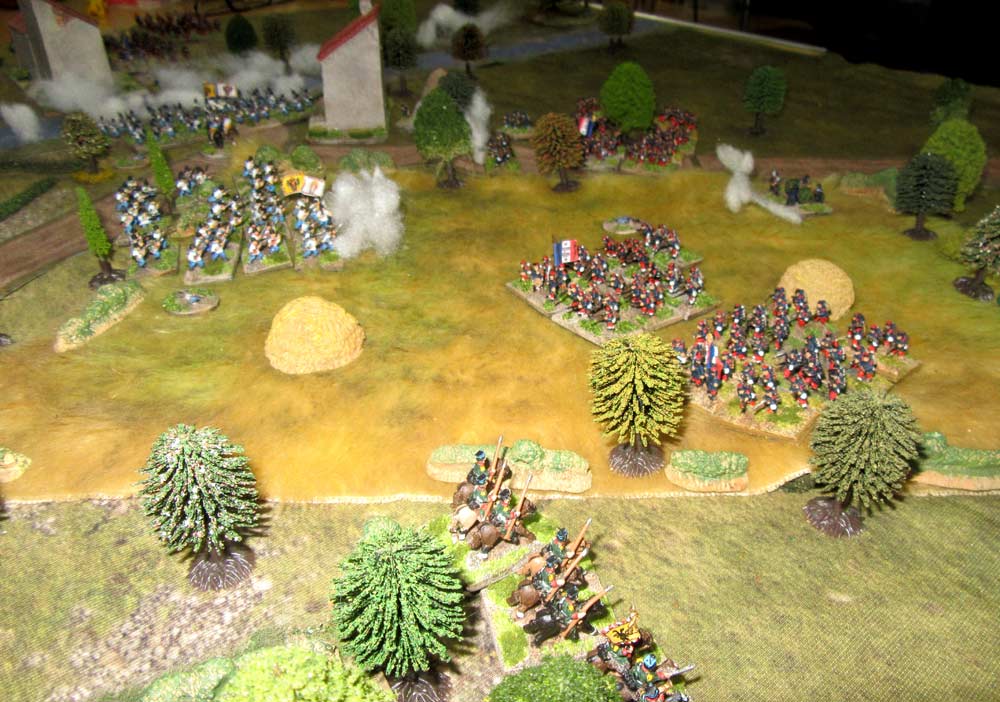 This all worked in favour of the Austrians. I sent my third brigade under Szabo to establish a defensive line anchored on the Cascina Nuova, to prevent the French in the north from bypassing the jaegers there and advancing straight into Magenta. Before that, the only troops who were there was a brigade of Austrian ulhans, whose job was to act as scouts, rather than launch charges. Meanwhile, the 29th regiment pulled back to the west of the farm.
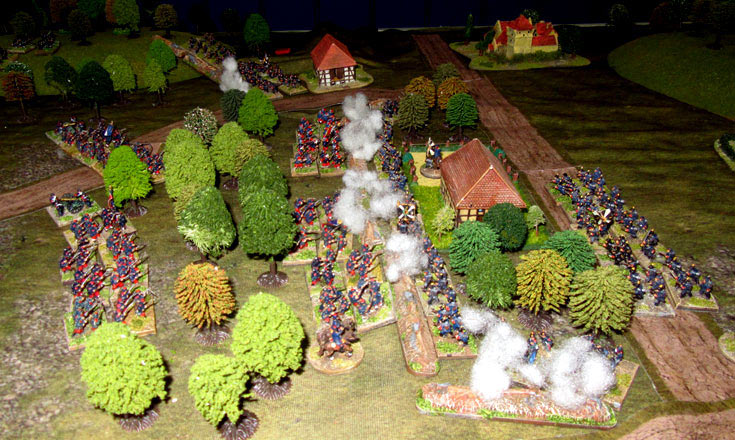
  By this stage of the game though, the Austrians were still in a bad way. the remnants of the 60th regiment (above) kept failing tests and losing stands, but eventually they stopped running, and enough of them were left to act as a reserve of sorts. So, by 1530hrs, after six turns of play (two hours of fighting) the Austrians had sort of pulled themselves together, using the halt in the French advance from the north to organised a somewhat shaky line.
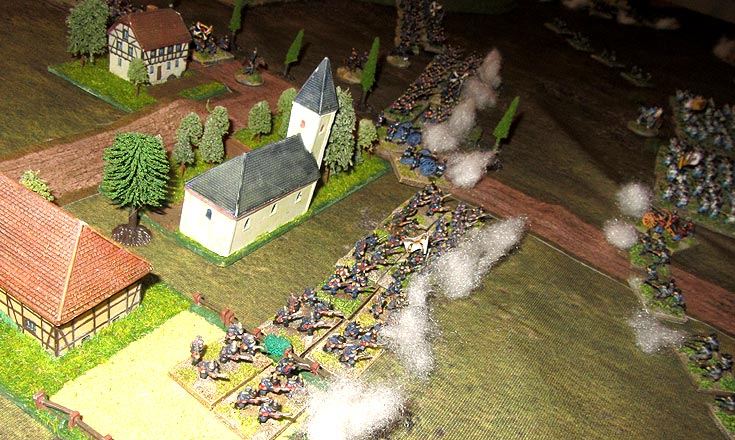
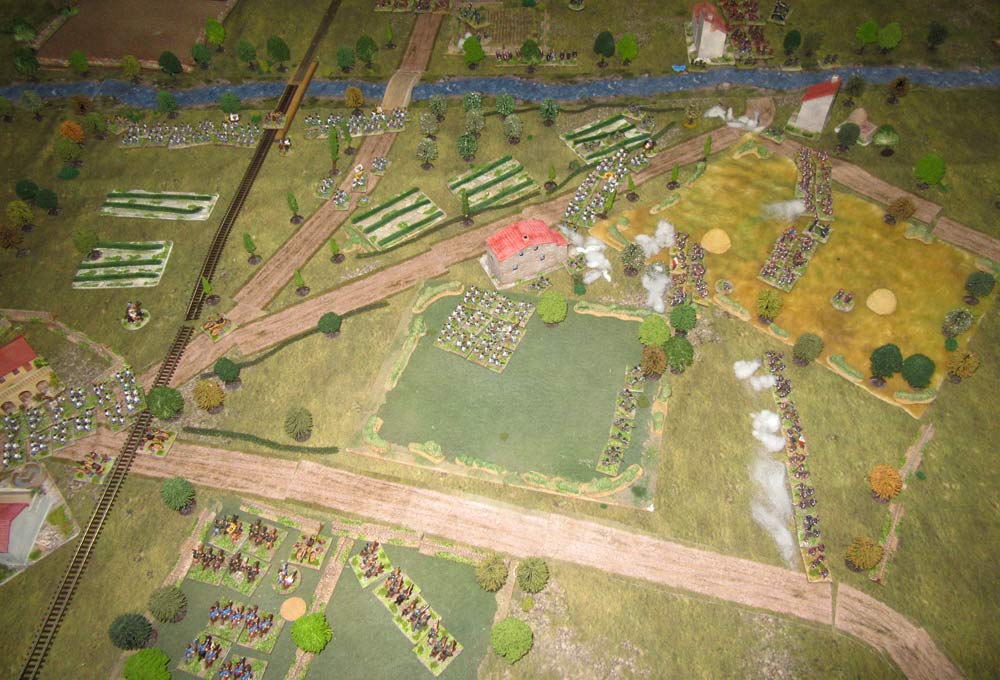 That’s where we’d decided to stop the game. You can see above the Austrian line forming around the red-roofed Cascina Nuova, and in the top right the French engineers still trying to finish their crossing at Boffalora. The Austrian cavalry in the bottom left, were really for show – they could only intervene on orders of the army commander, or if the French came within musket range of them. They never did, so they just sat there throughout the game!
  Historically, this was pretty much what happened, with one big exception. In the real battle, Mellinet’s Guard Division stormed the bridges at Ponte Nuovo, and punched a hole in the Austrian line. In our game that never happened, and they were happy to wait for the engineers at Boffalora (above). So, we stopped the game there, and deemed it a hard-fought draw. It was great fun though, and we both want to fight the next phase of Magenta sometime soon!

Very late in commenting but somebody should have! What a cool looking battlefield and the collection is excellent. Enjoyable AAR too. I will look forward to another Magenta game if it happens.
Thanks Joe. Writing a book has soaked up my time, and the blog has suffered, as has my wargaming, but we’re over the hump now, I’m doing blog posts again, and we’re getting games in. I enjoyed the 1859 game, and I’ll certainly do more soon!