Battling through Grangemello 1943 Phase 2
10th April 2025, 0 Comments
The Second World War, Rapid Fire Reloaded, 12mm
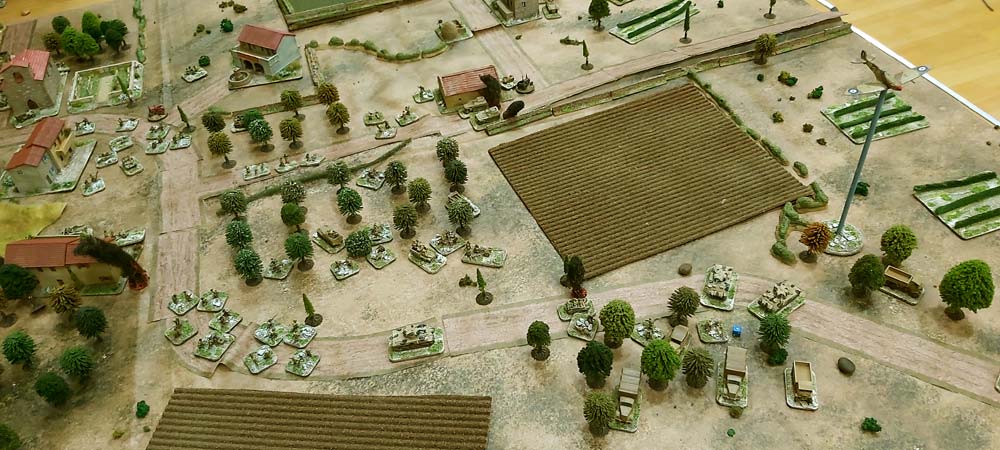
After a hiatus of a week, as I had an AGM to go to, we resumed our ‘Battling through Grangemello’ game this week, which was set in Sicily in July 1943. We’d stopped it at the start of Move 8 – a convenient point, as that’s when both sides had reinforcements coming on. In this one I was playing the Germans, while Sean commanded the British force. This sketch map shows roughly where we stood at the start of the move;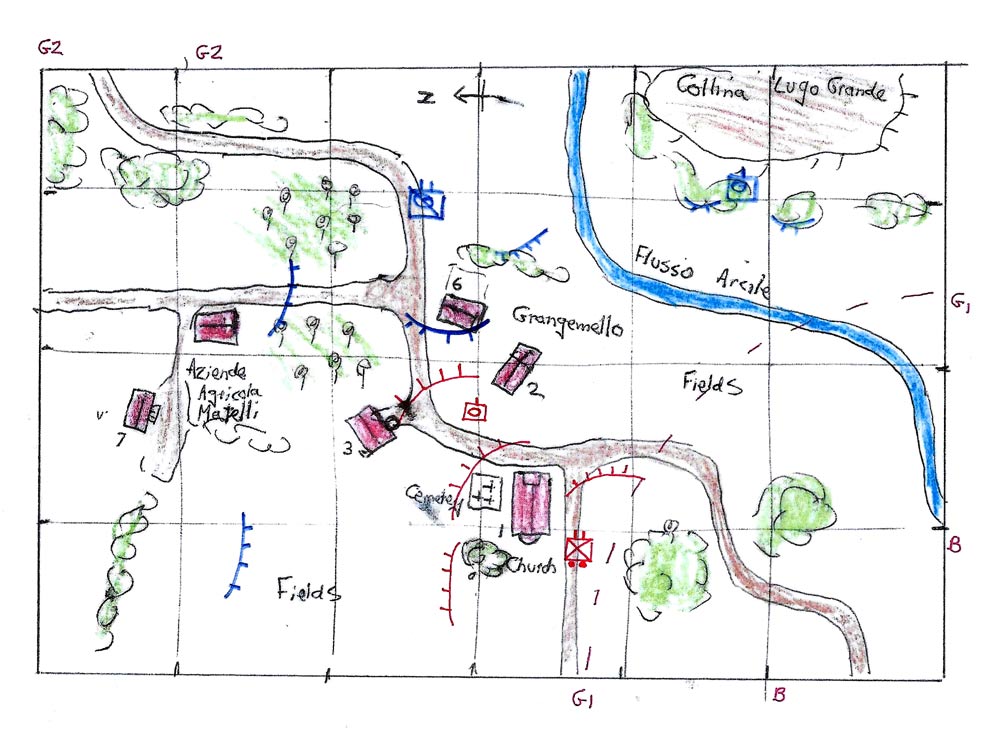 As you see, the British In red) had almost got their first objective – control of the four buildings that made up the hamlet of Grangemello. To win a clear victory though, they had to get AFVs off the road leading off the North-East corner, at G2-G2. My reduced strength Pz. Recon Bttn. of the Hermann Goring Div. had been pushed back, but were farm from beaten – and I still had my PzIV and Stug, on the east bank of the small Flusso Arcile river.
 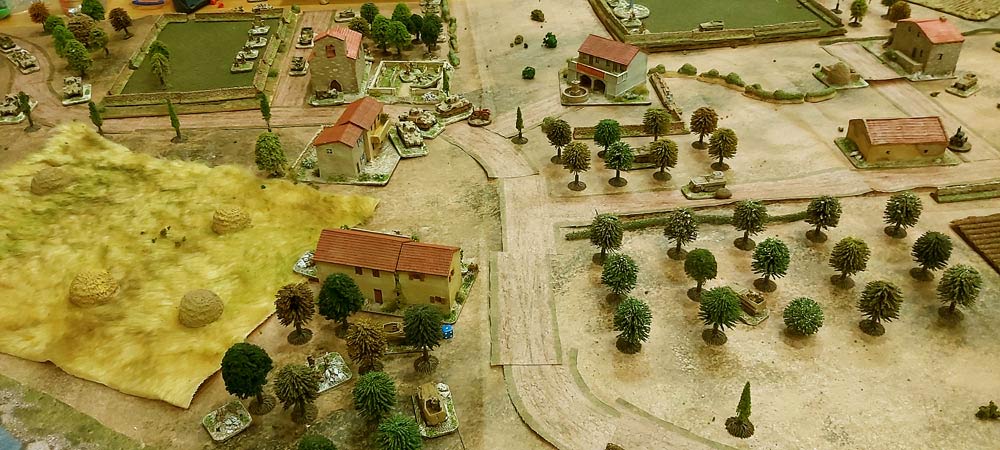 We’d both suffered about 25% casualties, but so far no tanks had been destroyed. However, we were both getting a battalion of reinforcements, and for the British another squadron of Shermans. Mine were elite Fallschirmjagers (below) coming on at G2, while the British infantry battalion and tank squadron arrived at B. I decided to deploy most of mine in the citrus grove between the forks in the road, while I pulled back my panzer-grenadiers.
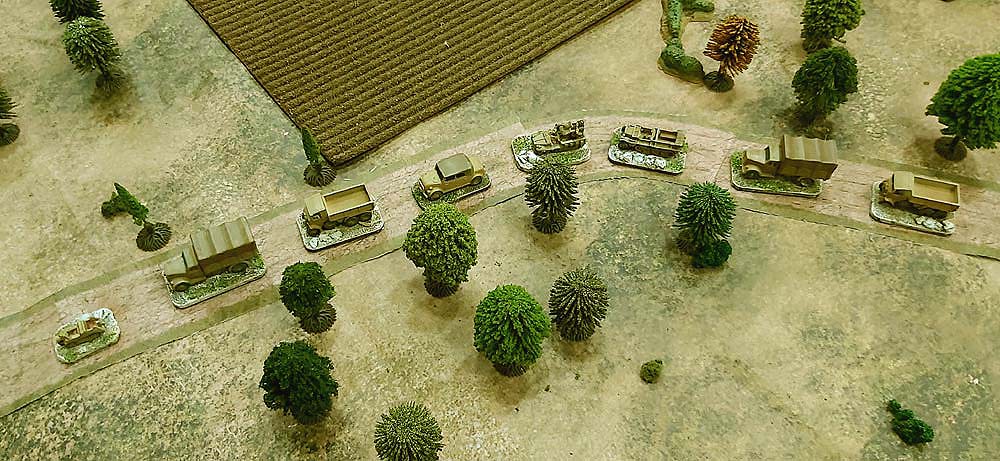 Sean was fairly cautious in his advance, but he was methodical too, concentrating on shooting up my two AFVs, and my panzer-grenadiers to the north of his infantry. My tanks shot back too, but my dice rolling was poor, and soon both of them were ‘damaged’. My one bonus was that my artillery battery Op was in action on the hill, calling down fire on the advancing British infantry, and whittling them down. Sean’s own OP was ‘in transit’ for most of the game.
 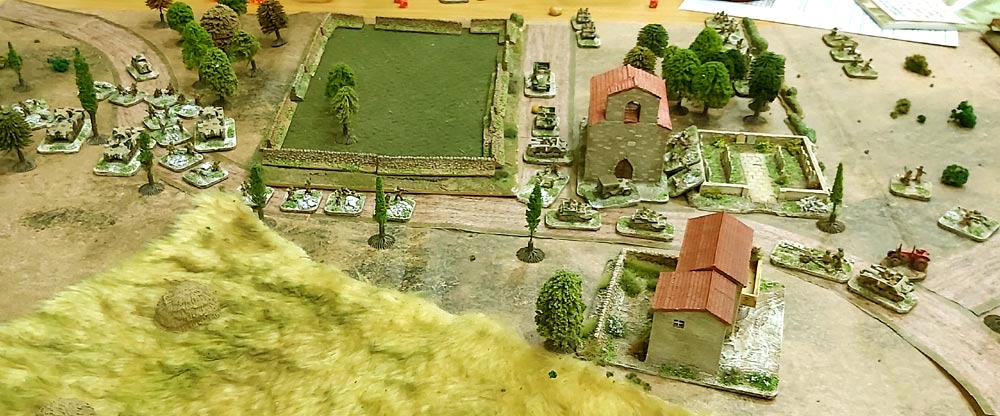 Then he wiped the grin off my face. In the space of two turns, he knocked out my PzIV and my Stug III. All I managed in return was to ‘damage’ a Sherman. Both were knocked out by the KOYLI’s 6-pdr anti-tank gun, deployed near the church. I had some sort of revenge though, as I then destroyed it with an artillery barrage. Still, I’d lost both AFVs, which meant with one Para 50mm AT gun I was going to be hard-pressed stopping his Shermans…
 Over on my right the last company of the panzer grenadiers in contact with the British was bombed and strafed, and so they pull back, mounting up and racing away around the back of the Martelli farm. There they were strafed again, and a Sdkfz. 250 half-track was wrecked, although the passengers survived to limp off. By now though, the tenor of the game had changed. The British had all four buildings of Grangemello. Now Sean went for broke.
 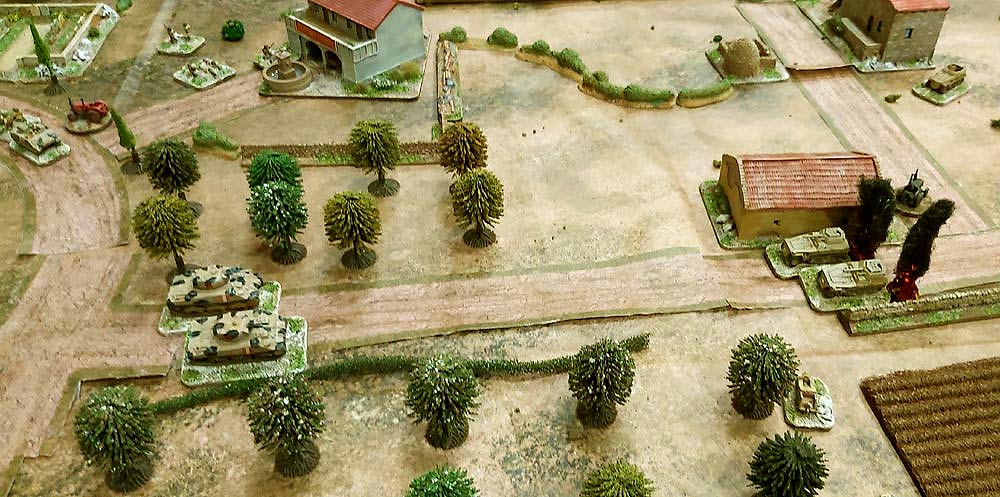 That meant pressing down the road to the north-east – the direction of Catania. To avoid upsets a pair of Shermans swung off onto the western fork leading to the Martelli farm, and brewed up the two Sdkfz. 250/9s, with their 20mm autocannon, which had been guarding the flank of the fallschirmjagers as they deployed in the citrus grove. That meant the Pz. Recon. Bttn. was now out of the game – only scattered remnants remained.
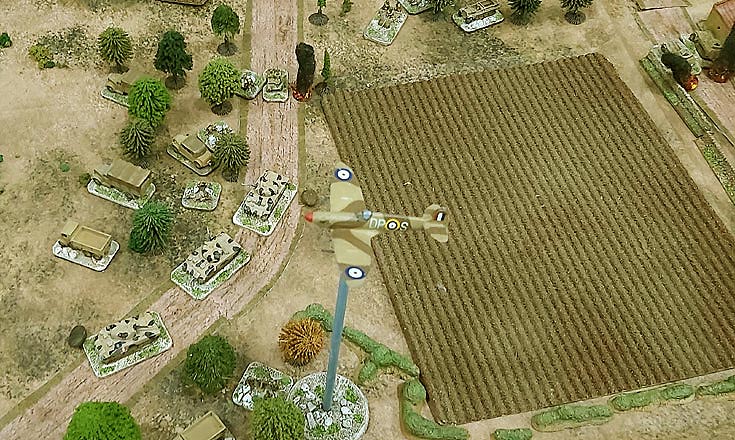
 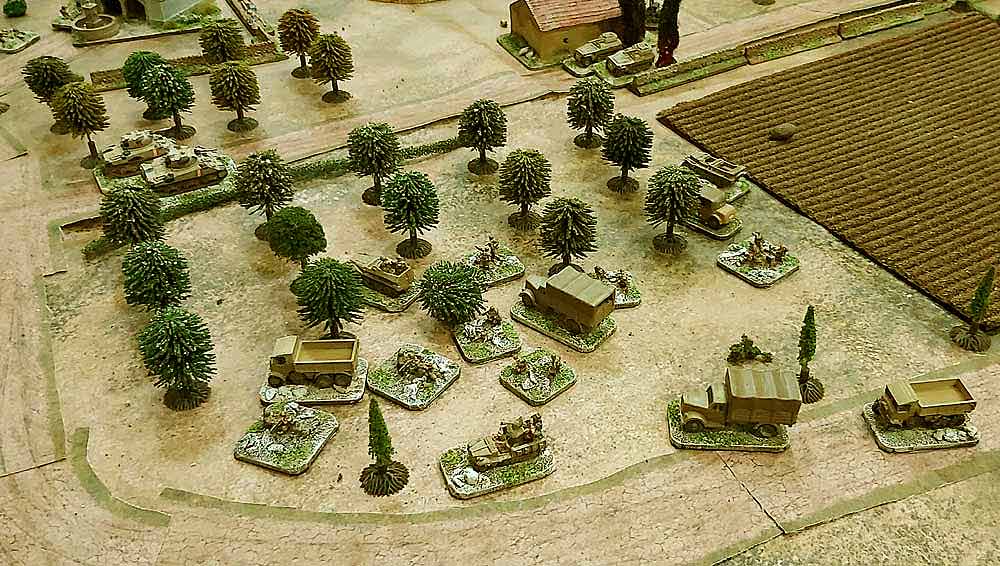 After a pause to regroup around the village the British set off again, with the Shermans leading the way. Standing in their way were the fallschirmjagers in the citrus trees, or in copses further down the Catania road. Sean planned to bomb and strafe these with his aircraft, but he hadn’t reckoned on my 20mm flak gun on the back of an Sdkfz.10. With one Spitfire shot down and a Kittyhawk damaged and driven off, Sean became more respectful of the flak gun!
  Still, I was running out of options. For a British win, they had to exit at least one AFV off the Catania road at G1-G1 by the end of Move 16 – and we were now on Move 13. What stopped him was the Hero rule. For an AFV to trundle past enemy infantry, he needed friendly infantry within 6″. Sean’s Green Howards’ had been left behind by the Shermans, and so it was all about passing those Hero tests, to keep moving towards the table edge.
 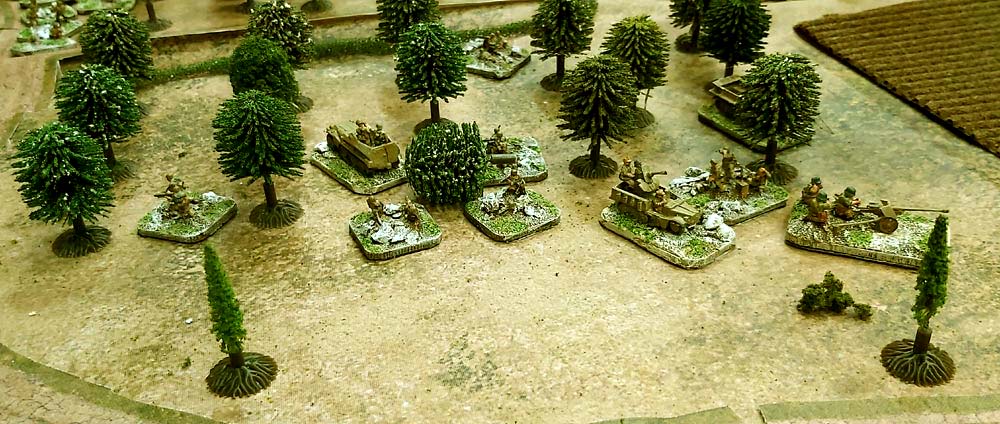 I didn’t have panzerfausts – just AT rifles, which were pretty useless. Even my PAK 38 50mm AT gun didn’t seem to do anything, apart from damage a Shermans. Sean though shot up those copses by the roadside, where I’d deployed a company of fallschirmjagers. They were ground down by aircraft and HE from the tanks, and eventually Sean cleared a gap for his tanks. A squadron raced off the table, and that was that – a clear British victory!
  It was a great little game though, and it played right to the finishing line. The rules worked very well indeed, and even the Hollywood-esqe Hero rule came into its own. We’ll certainly be playing another game like this very soon! It truly was one of thiose classic games that stay with you long after the event! Meanwhile, some people have asked me about the scenario, the orbats and any house rules. So, here they are. I hope you can try Richard Marsh’s scenario for yourself – and like us, don’t worry about changing things about a bit!
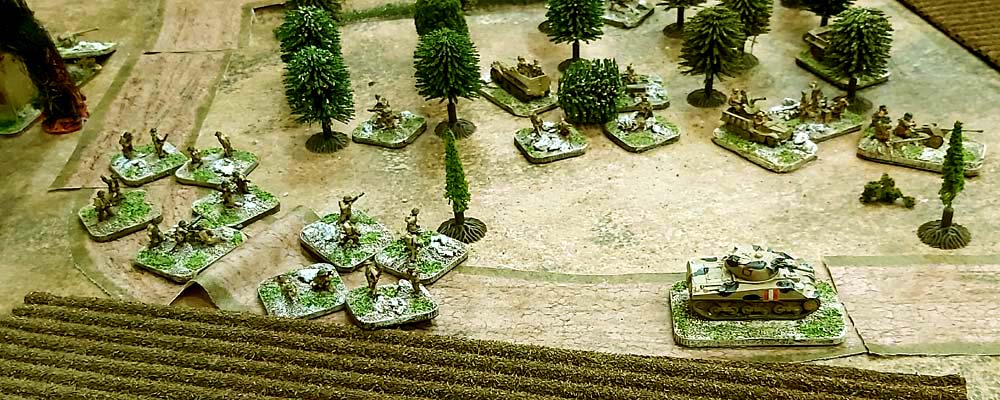
The Scenario – Battling through Grangemello 14 July 1943
This scenario represents the 15th Brigade of the 5th (Yorkshire) Infantry Division and the supporting tanks of the County of London Yeomanry’s assault on the farming area of Grangemello east of Lentini. This formed part of the Division’s advance on Lentini and the Primosole Bridge. Opposing them are elements of the Hermann Göring Panzer Division and the 1st Fallschirmjager Division.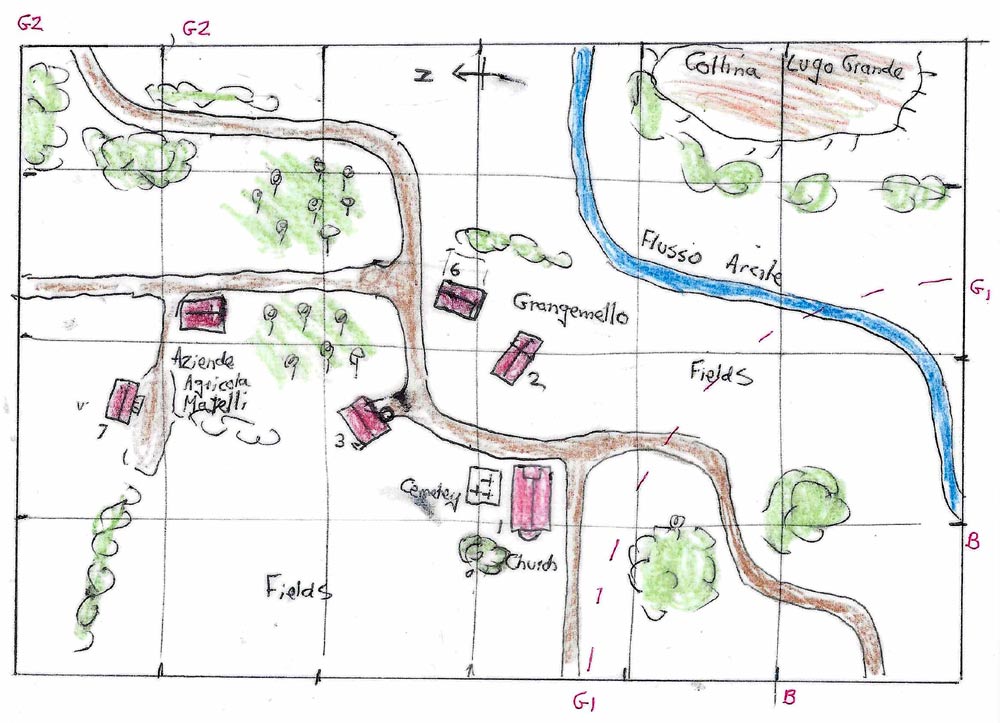 Orders German: Defend Grangemello and prevent the British from moving further north.
British: Drive Germans out of Grangemello, and advance through the wooded countryside to the NE.
Deployment
German Elements of HG Pz Div. (including the armour and the OP team) start on the table. They must be north of the line G1-G1, and their positions identified by concealment markers.
• Move 8: reinforcements from 1st Fallschirmjager Bttn. enter at G2.
British
• Move 1: Move Green Howards, B Sqn CLY and the OP of 91st Fld. Regt. RA enter between B-B.
• Move 8: Reinforcements enter between B-B.
Special Rules
Observation: If in contact, walls and hedges conceal small AFVs, and provide partial concealment for larger AFVs (eg tanks and Stugs). Use concealment markers (p.15 of Reloaded Extra) for use by the initial German defenders.
Morale: When the German reinforcements arrive, add their morale value (figures strength) to the number of the Pz. Recon. Bttn. survivors. This becomes the new morale value for the combined German force.
Aircraft: At the start of each turn, the British player rolls a D6. On a 5-6, a friendly aircraft appears over the table. Roll again. On a 1-3 it is an RAF Spitfire, and 4-6 it’s a RAAF P-40 Kittyhawk. It lasts on the table for a single turn.
Movement: No unit can move more than 12” during its first move on the table.
• All woods/olive groves are open.
• All buildings start the game intact
• British tanks may carry up to 4 infantry apiece.
• Firing: Ops may not call down fire (by guns) on targets within 12” of their position, or within 6” of friendly units.
Victory Conditions
British
• To Win: Capture Grangemello (all four buildings) and either drive off all German forces from the table, or cross exit line G2-G2 with one AFV by the end of move 16.
• To Draw: Capture Grangemello by the end of move 16.
German
• To Win: Prevent the British from achieving all their victory conditions.
• To Draw: Keep the British from driving your force from the table or crossing the exit line G2-G2 with one AFV. Order of Battle
BRITISH
Enter on Move 1:
County of London Yeomanry (Elite)
• B Squadron – 3 Sherman IIIs (75mm)
1st Bttn. Green Howards [CO + 55 figs Regular]
• HQ Coy: (CO+2 figs), 2” mortar team (2 figs), PIAT team (2 figs), White scout car
• Carrier Platoon: (3 figs W. PIAT), w. Bren Carrier
• 4 Companies, ea. 8 figs.
• Support Coy. MMG team (3 figs), 3” mtr. Team (3 figs), 2 Bren carriers
• AT Platoon: 6pdr. AT gun (3 crew), w. Loyd carrier tow
91st Field Regt. RA (off-table) 2 x 25pdrs.
• On Table from Move 1: OP team (2 figs) w. jeep
Reinforcements enter on Move 8:
County of London Yeomanry (Elite)
• C Squadron – 3 Sherman IIIs (75mm)
1st Bttn. Kings Own Yorkshire Light Infantry [CO + 55 figs Regular]
• HQ Coy: (CO+2 figs), 2” mortar team (2 figs), PIAT team (2 figs), w. staff car
• Carrier Platoon: (3 figs W. PIAT), w. Bren Carrier
• 4 Companies, ea. 8 figs.
• Support Coy. MMG team 93 figs), 3” mtr. Team (3 figs), 2 Bren carriers
• AT Platoon: 6pdr. AT gun (3 crew), w. Loyd carrier tow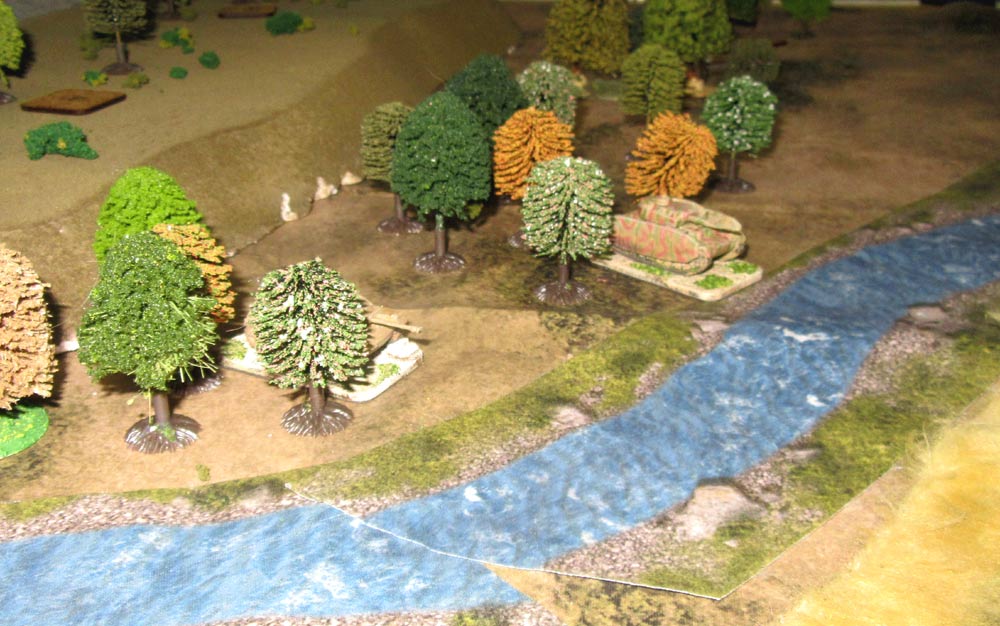 GERMAN
On Table:
Panzer Recon Bttn., Hermann Göring Pz. Div [CO + 37 figs Elite]
• HQ Coy: (CO+2 figs), 50mm mtr team (2 figs) w. Sdkfz. 250/3 half-track (cmd)
• Armd. Car Coy. (half track): 2 Sdkfz. 250/9 half-tracks (20mm)
• 2 Pz. Gren. Coys., ea. 8 figs (w. AT rifle) w. Sdkfz. 250/1 half-track
• Heavy Weapons Coy: MMG team (3 figs) w. Sdkfz. 250/1 half-track, 81mm mortar team (3 figs) w. Sdkfz. 250/7 (mtr)
Elements of HP Pz. Div. (Elite)
• 1 x Pz. IVH (long 75mm)
• 1 x Stug III (long 75mm)
Pz. Art Regt. HG (off-table) 2 x 105mm how. •On table at start: OP team (2 figs) w. Kubelwagen
Reinforcements enter on Move 8:
I Bttn., 3rd Fallschirmjager Regt. [CO+34 figs Elite]
• HQ Coy: (CO+2 figs), 50mm mtr. team (2 figs) w. Heavy Car
• Recon Platoon: Recon team (2 figs) w. Kettenkrad
• 2 Para. Coys., ea. 8 figs (w. AT rifle) w. truck
• Heavy Weapons Coy: MMG team (3 figs) 81mm mtr. team (3 figs) w. 2 light trucks
• AT Coy: Pak 38 (50mm) AT gun (3 figs)w Sdkfz. 10 tow
• Flak Coy: Sdkfz. 10/4 half-track w. 20mm flak fun (3 crew)